Want to start advertising products on Allegro? We have prepared a step-by-step guide to upload your products to Allegro.cz or Allegro.pl and create your first campaign.
Before we get started, make sure you have created an account on Allegro.cz and have everything you need set up. A detailed procedure for registering a business account on Allegro can be found here.
Please note that the marketplace where you create your account will be your default storefront. The default storefront cannot be changed and you must always have your offers displayed on this market. Our app currently only supports selling on the default storefront, so if you want to sell on Allegro.cz, create an account on Czech Allegro and if you want to sell on Allegro.pl, create an account on Polish Allegro. Within Allegro you can then post these offers on other markets, find out more here.
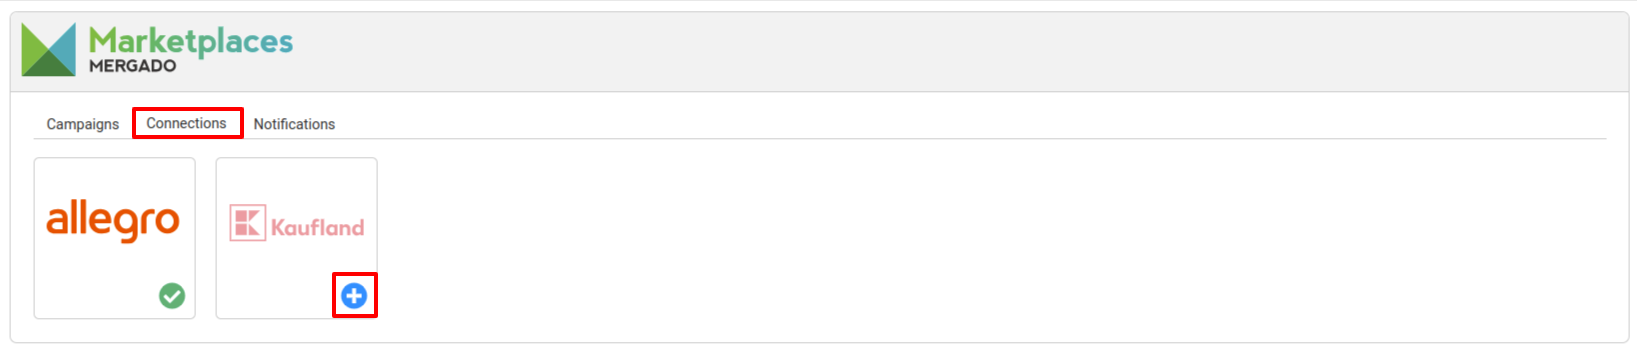
Creating connection
The first thing to do is to activate the Mergado Marketplaces app in the Mergado Store. Once you’re done, you can jump into the app to create a new connection to Allegro. The procedure is as follows. Go to the connection menu and then click on the + icon in the blue circle.
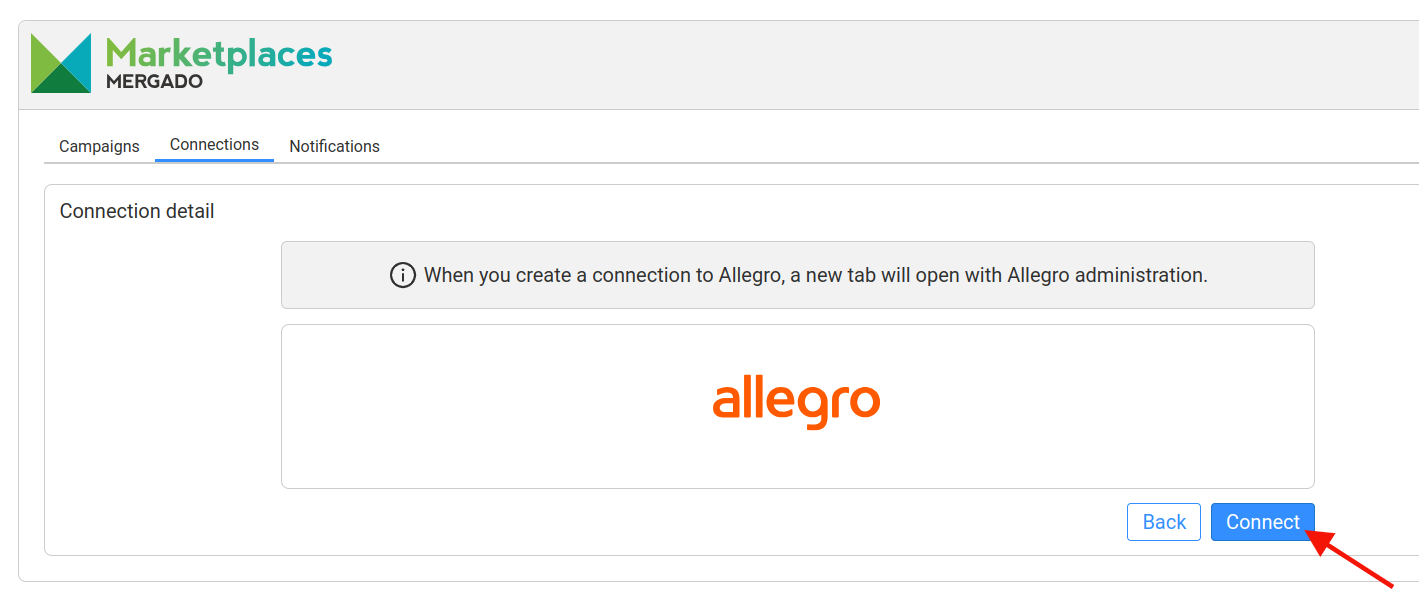
Then click on the “Connect” button.
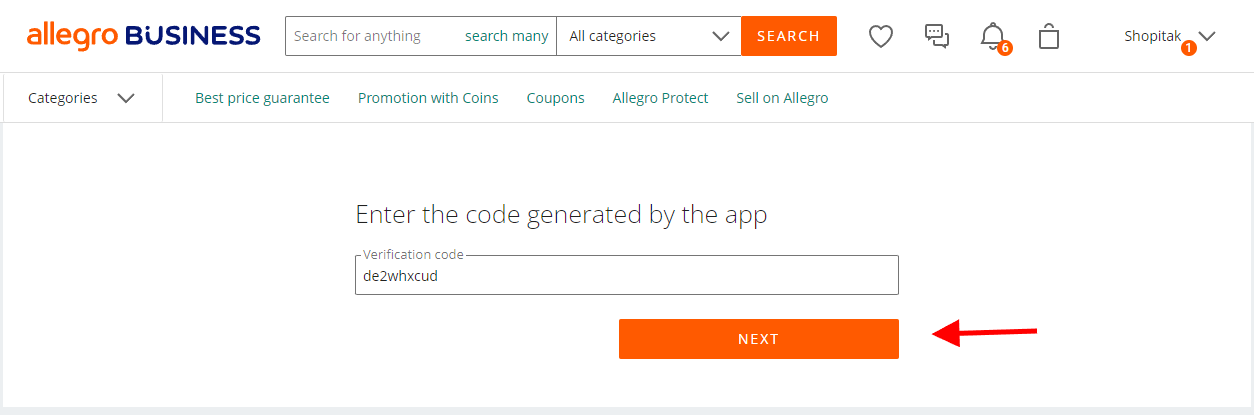
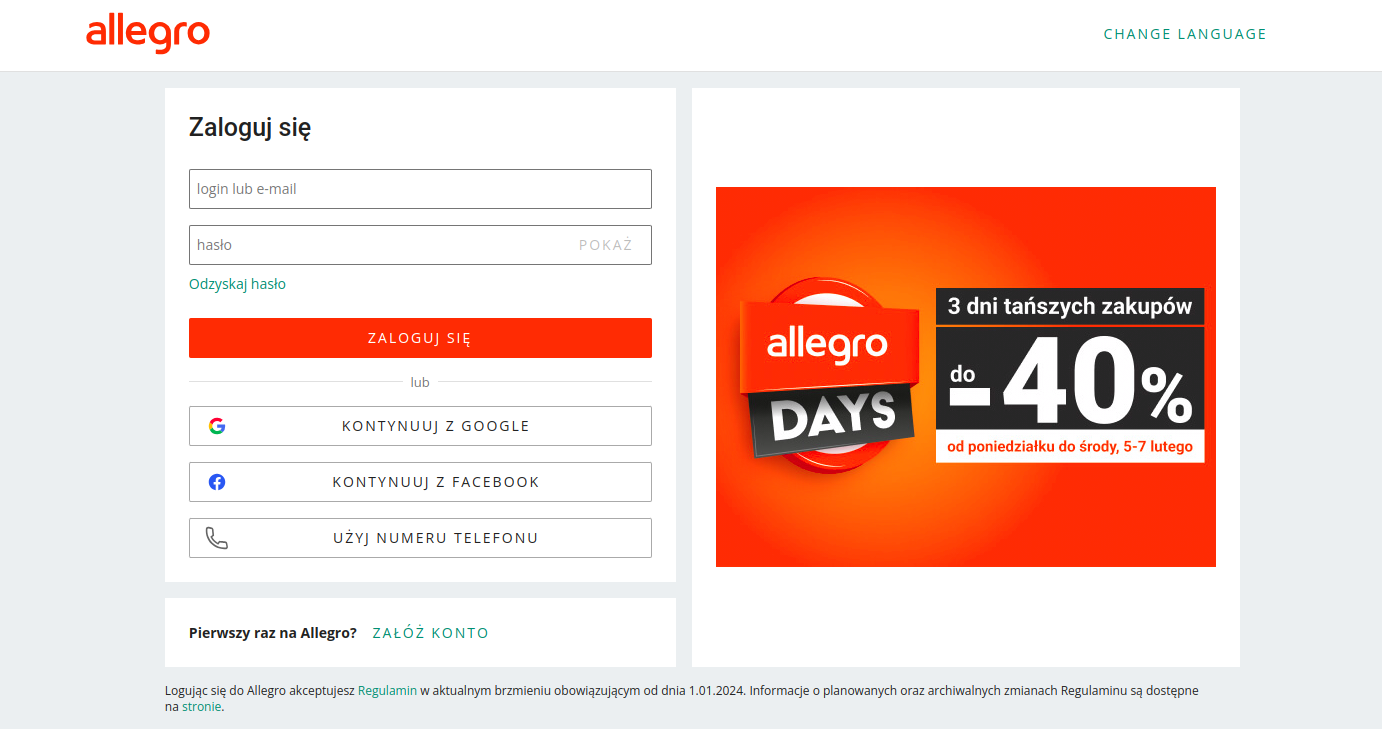
When you click on the “Connect” button, a new page will open in your browser and click on the “Next” / “Dalej” button.
If you are not logged in, enter your login details and log in.
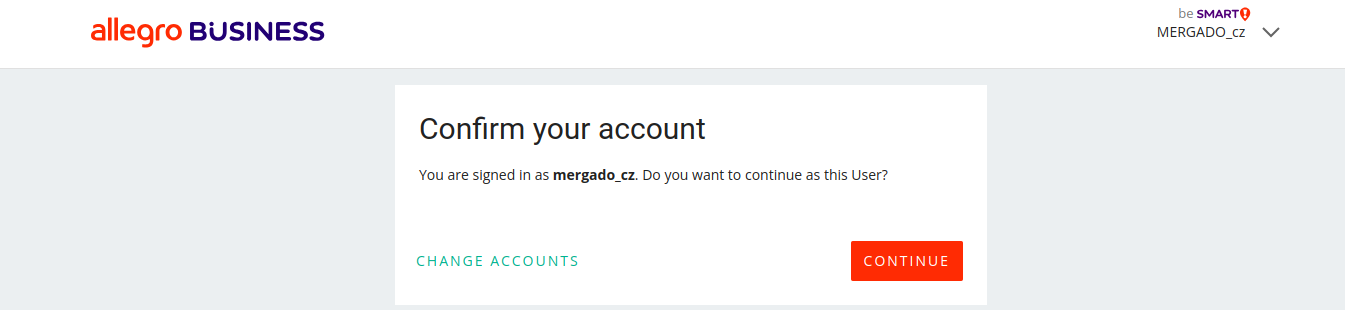
Confirm the connection of the application for the account by clicking “Continue”:
Allegro will notify you on the last page that you have successfully connected.
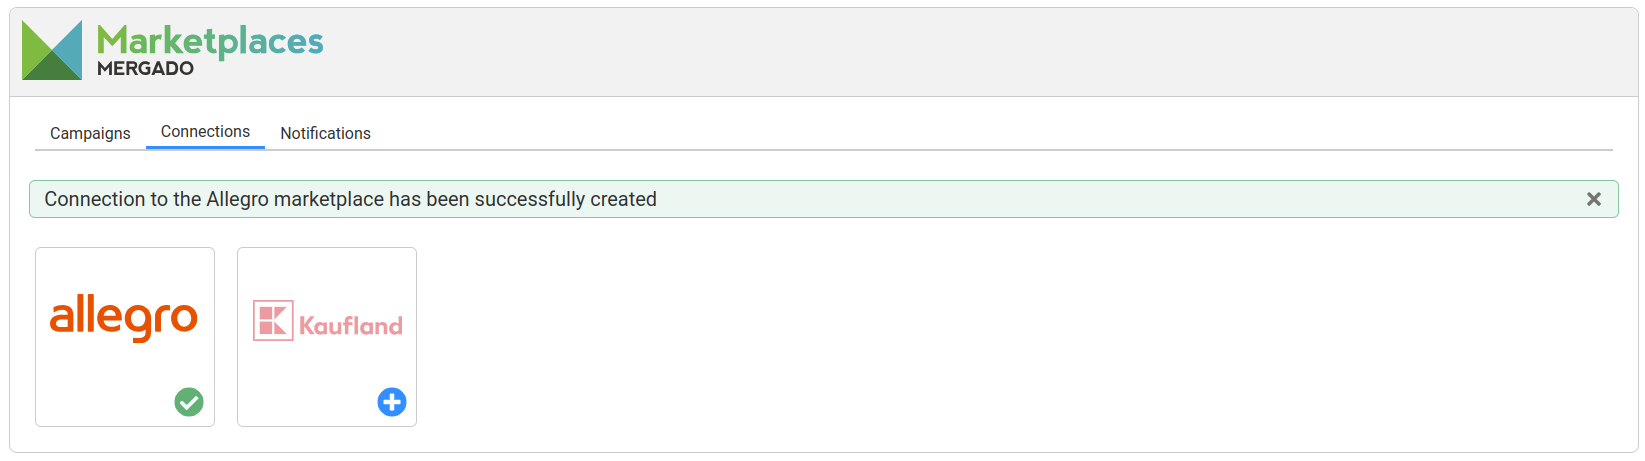
Then return to the app and you will see a successful connection message. Instead of the + button, you now see a green button with a white check mark.
Now you are connected.
Creating campaign
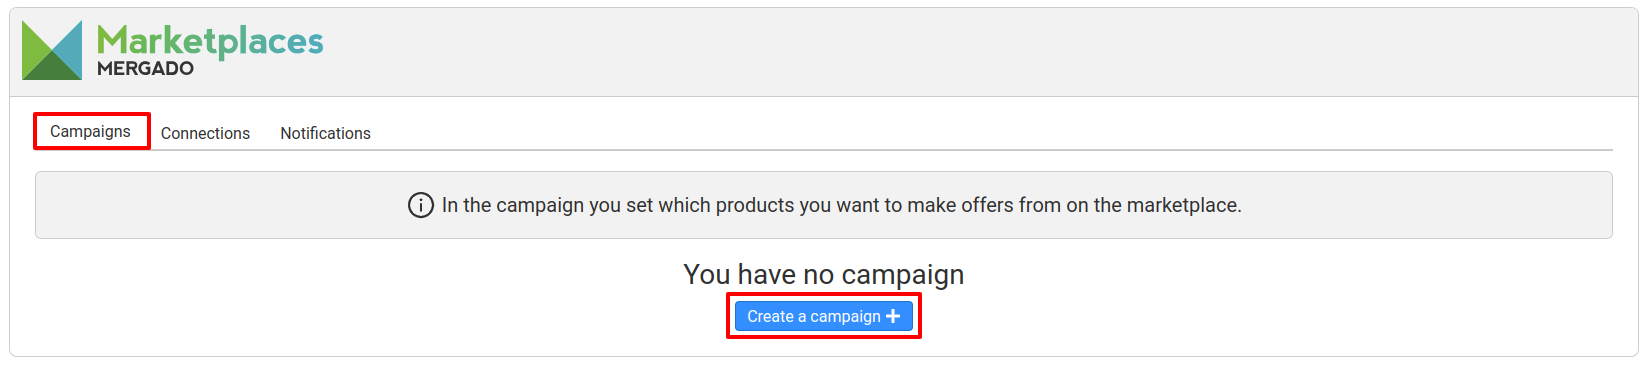
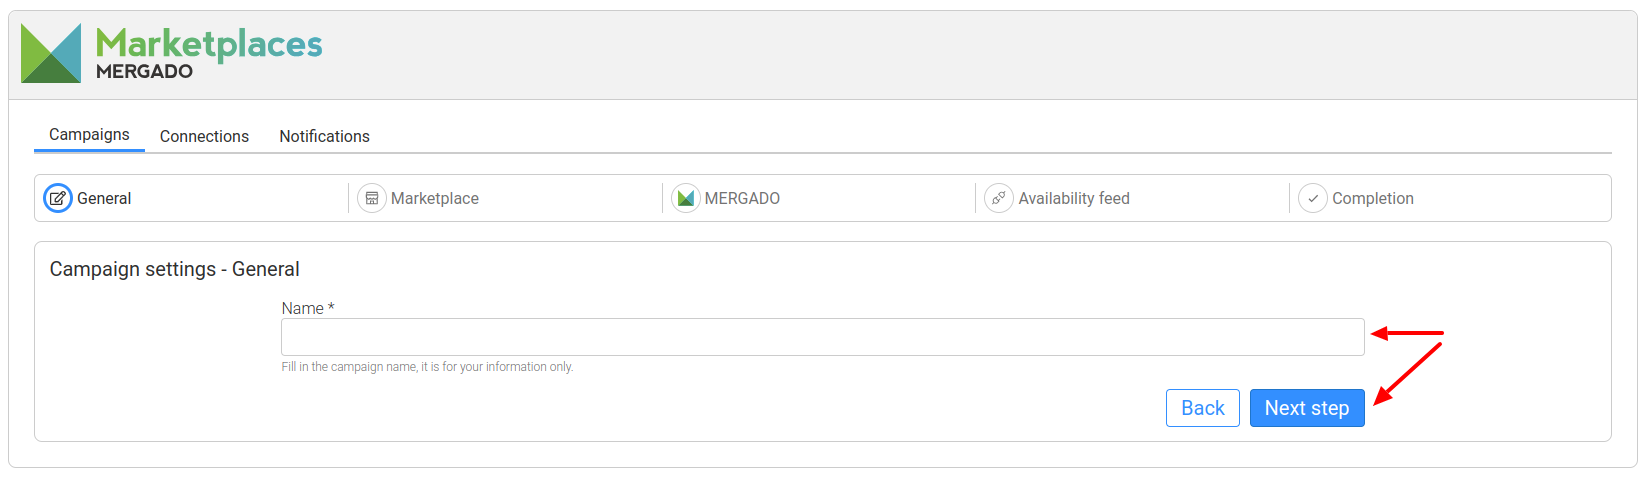
After creating the link, go to the “Campaigns” tab in the menu and you will see the “Create Campaign” button in the middle of the page. You will be greeted by our 5 step guide to creating a campaign.
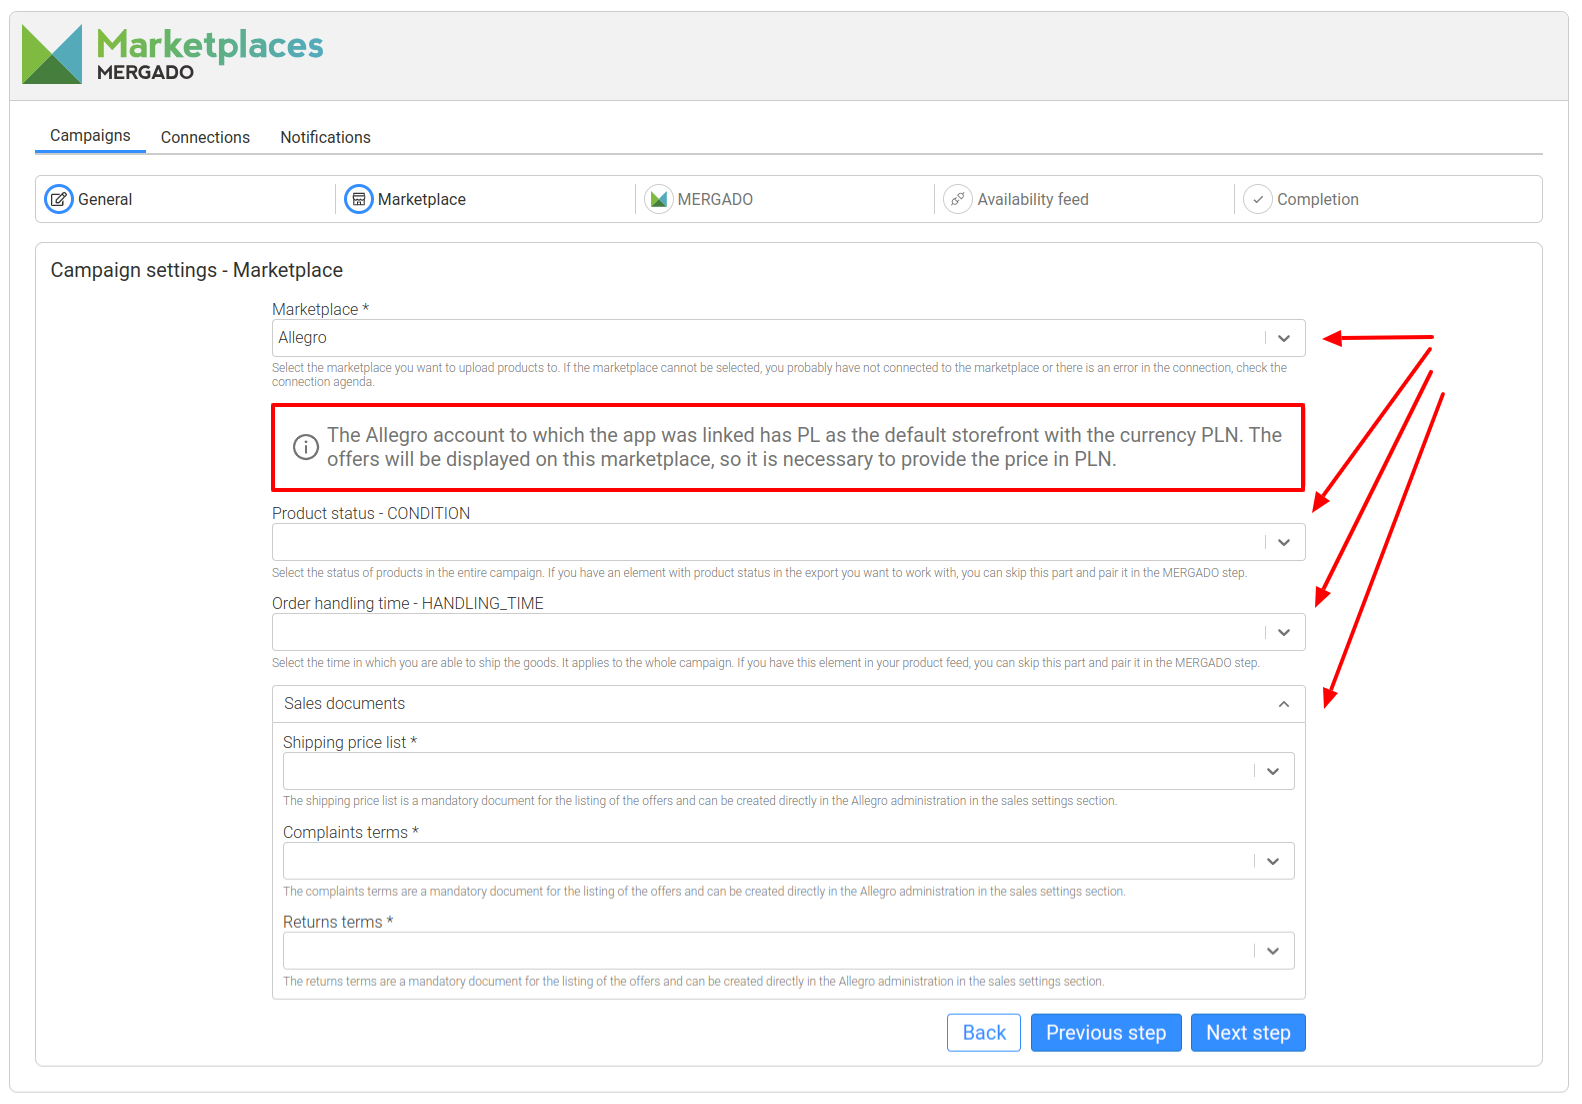
- The next step is to choose and set up the right marketplace, in our case it is Allegro. An information window will notify you what your Allegro default storefront is that you will be selling on. The listings will be displayed on this marketplace, so you need to pair the price in the currency of the default storefront.
In this step you can also select the CONDITION and HANDLING_TIME for the entire campaign. However, if you have this element included in the product feed, you can pair it in the next step.
Next, you need to select the Shipping Pricing, Returns & Terms for the campaign. You can create these sales documents directly in the Allegro administration in the sales settings section.
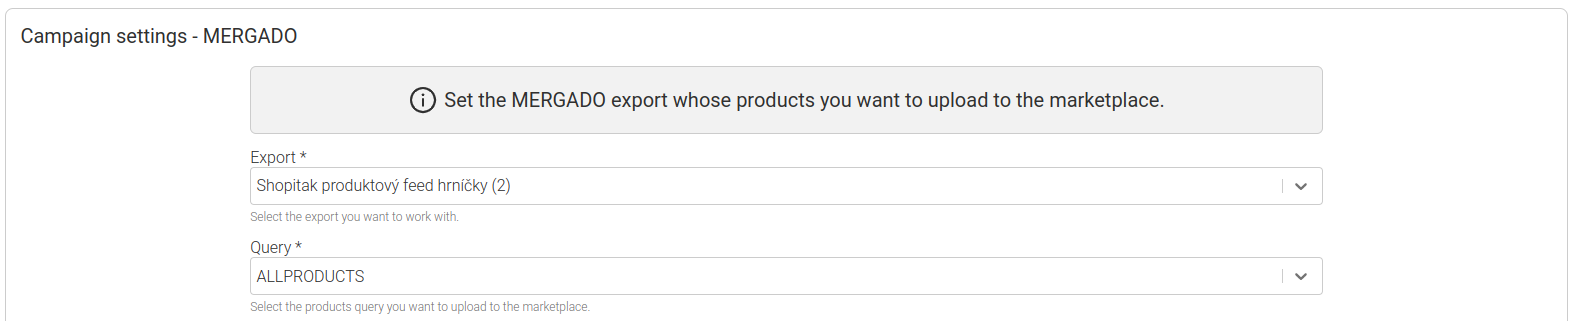
If you don’t want to send all products from a given project to the marketplace, create a selection of products you want to list on the marketplace in Mergado Editor. Please note that you cannot change the selection later in the campaign settings. At the same time, it is not possible to edit the product composition in the application using the hide rule, as this rule is not transferred to Mergado Marketplaces.
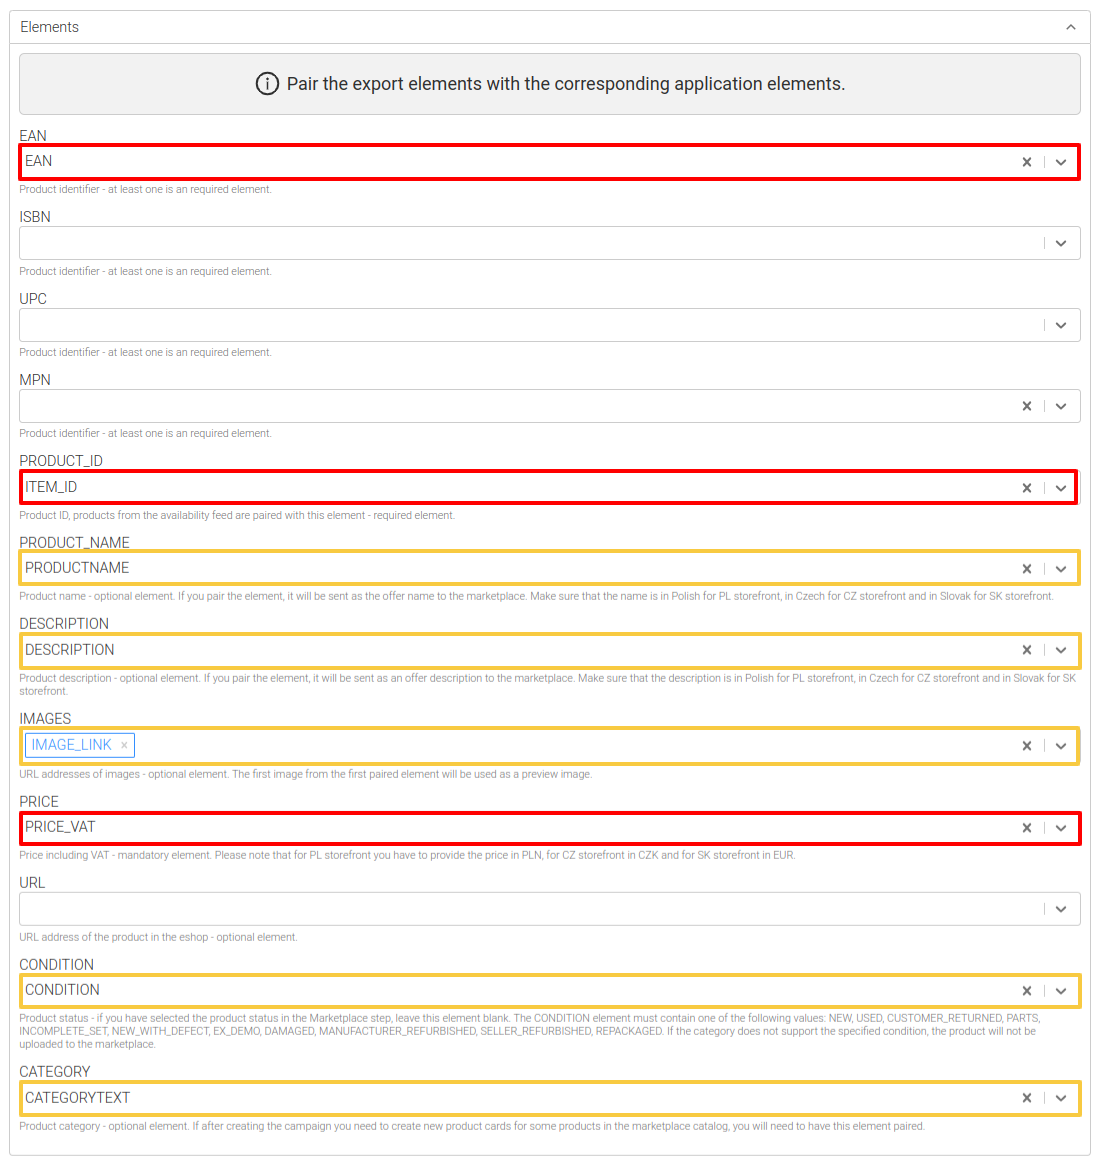
You must map 3 elements:
- EAN / ISBN / MPN / UPC = product identification element. You can map one or more.
- PRICE = element that contains the price (price must be in the currency of the default storefront).
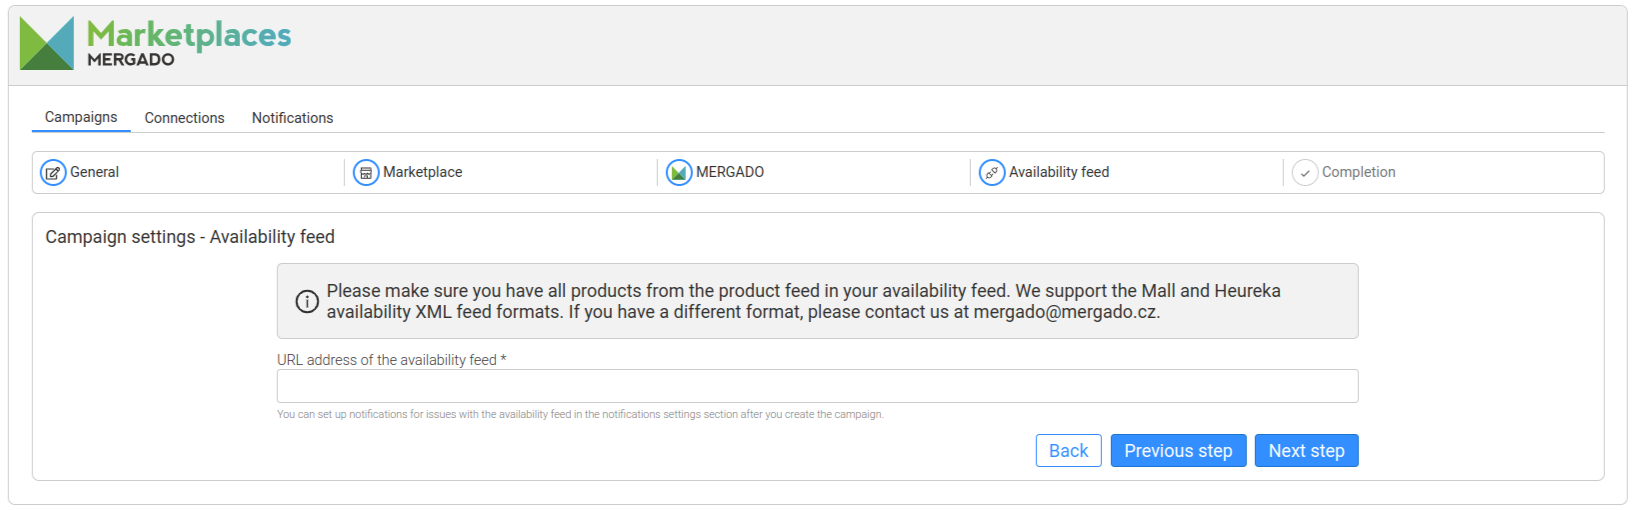
- PRODUCT_ID = an element that contains the product ID. The product ID in the availability and product feed must match in order to correctly pair availability.
If you have already filled in the values of the CONDITION and HANDLING_TIME elements in the previous step, do not map the elements here.
The PRODUCT_NAME, DESCRIPTION and IMAGE elements are optional, but if you pair them, we will try to send your product data to Allegro. Please note that Allegro only accepts specific HTML formatting for product descriptions. More information can be found here. If you do not pair these elements, or if there is something wrong with the data provided, we will use the data provided by Allegro to publish the offer.
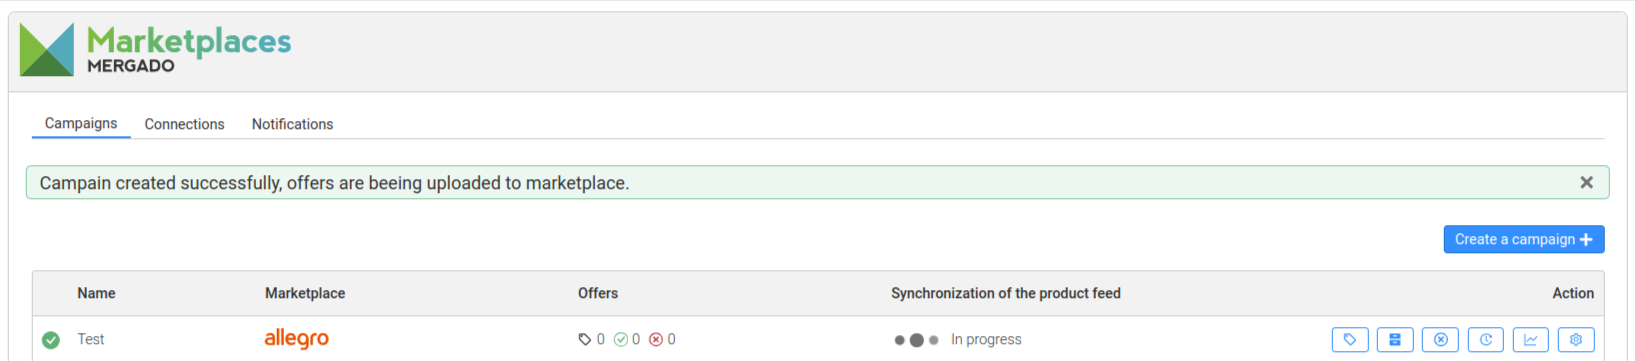
The campaign has been created and your bids are now being uploaded to Allegro. This process may take some time, so please be patient. However, this is not the end of the process of uploading bids to Allegro. It is a good idea to check the number of uploaded and unuploaded products and correct any errors.
After the synchronization of the product feed is complete, click on the campaign detail and check the validation section for any error messages. An explanation of the most common validation messages can be found here.
Did you find the error message “Allegro couldn’t find a product with the specified ID” in the validation section? This message means that there is no product card for the product in the Allegro catalogue yet. Detailed instructions on how to create a product card via our application can be found here.